We get asked all the time about what tools are required to convert an empty van into a home on wheels.
So instead of always writing out a big list each time as a message reply, we figured it was about time we wrote out a list and put it here in an article to share! The following articles will detail all the tools we used to:
- Convert our Sprinter van into a stealthy home on wheels
- Install and connect the off-grid electrical system including the lithium battery and solar panels; and
- The tools that we recommend to keep in the van for repairs and upgrades.
This article will cover all the essential tools we used to convert our Sprinter van from a humble and bare cargo delivery van into a comfortable home on wheels.
Each respective article is designed to be a reference companion piece to our show and tell video we have filmed and uploaded onto our YouTube channel.
I have provided an eBay Partner Network link for most item so you can see what they look like and how much they cost. See your local hardware store to see what they have available before buying online.
Ready to go? Let’s dive in.
Tools we used to convert our van
Safety Equipment:
- LED Head Lamp: Very useful to help see what you’re doing in dark and cramped places. While not strictly safety equipment, seeing what’s going on will reduce risk of injury – especially when crawling under the vehicle. A good quality USB rechargeable LED headlamp with multiple power settings is not expensive and will serve you for many years. Link: http://tiny.cc/ve0xnz
- Gloves: Our preference is for the thin gloves with a nitrile / chemical resistant coating on the palm and kevlar or similar woven in for extra protection. Thin gloves are better as they are more dexterous, and so you’re more likely to wear them all the time. You will also want a packet of disposable nitrile gloves to wear when handing any chemical, paints and solvents. Link: http://tiny.cc/mi0xnz
- Safety Glasses/Goggles: Absolutely essential. We’ve both had close calls with metal or wooden splinters shooting off while cutting something. Always wear a rated pair of clear or tinted plastic safety glasses when using any power tools – especially when cutting or grinding. DO NOT use GLASS or non safety rated glasses while using power tools. Link: http://tiny.cc/co0xnz
- Ear Muffs/Plugs: Our preference is to use hard shell ear muffs as often as possible, as they’re easier to quickly use, more environmentally friendly (not disposable) and hygienic compared to ear plugs. The main downside to the muffs is that they can interfere or have comfort issues if you’re wearing safety glasses, headlamp etc all at the same time. It’s a good idea to have a few packets of ear plugs in your kit to use when required. Link: http://tiny.cc/kv0xnz
- Dust Mast / Respirator: While they are in very short supply at the time of writing due to the COVID-19 pandemic, you will probably need a couple of packets of dust masks in your kit to use as required and for different jobs. Masks vary in quality and filtration levels, and you should spend a few minutes to read the pack and ensure the mask you are using is suitable for what you are doing.
- A basic cheap P1 (N90) mask is ideal for nuisance, large particle dust if you are sawing plywood or cutting aluminium sections. Link: http://tiny.cc/f70xnz
- A P2 (N95) rated mask has better filtration and will provide more protection from mists and vapours in a well ventilated space, such as if you are doing some quick spray painting outside. Link: http://tiny.cc/ta1xnz
- A half face or full face respirator mask provides a higher level of protection and uses replaceable filters. A respirator mask with a rated filter installed is what you would use if you are spray painting large areas or using other potential harmful chemicals which emit Volatile Organic Compounds (VOCs) as they off-gas. Link: http://tiny.cc/he1xnz
- Unless you are planning to re-paint the exterior of your vehicle, generally you will be fine with a packet of P1 and P2 rated masks for a standard van conversion or tiny home build.
- DO NOT reuse dust masks multiple times, it renders them useless and puts your lungs at risk!
- Masks are also ineffective if they are the wrong size or not a good seal on your face. Be careful to ensure it is fitted securely and tight around you face, or it may be a false sense of security!
Power Tools:
Cordless option is recommended where and when possible, if the budget allows. Especially for the drills.
- Impact Drill: Great for quickly and easily installing self-tapping screws and other fasteners such as bolts. Cordless is a must. The beauty of a impact drill is its versatility. There’s a huge variety of different attachments for the quick-connect impact drill that allow it to fasten and remove multiples types of fasteners. You can even get drill bits with an impact drill attachment for extra versatility. Link: http://tiny.cc/xw0rnz
- Drill Driver: The trusty drill drivers is what you will use to drill pilot holes, holes for bolts or rivnuts, and also attach smaller screws. Most quality drills have a clutch and multiple speed/power settings to switch between different uses. You will want to buy a good set of drill bits, hole saw bits for the drill. You can share bits, such as a philips head attachment, made for the impact driver with the drill driver too. Link: http://tiny.cc/9y0rnz
- Circular Saw: This is the tool you will use most for doing long straight cuts and quickly cutting down material to size. Be careful using it to trim off small sections, as bits may get caught in the blade as it spins around. The circular saw has different blades available to suit different materials (wood, aluminium etc) and how neat you need the cut. A drop saw or bench saw would also be good to have available if you have the space and budget. Link: http://tiny.cc/610rnz
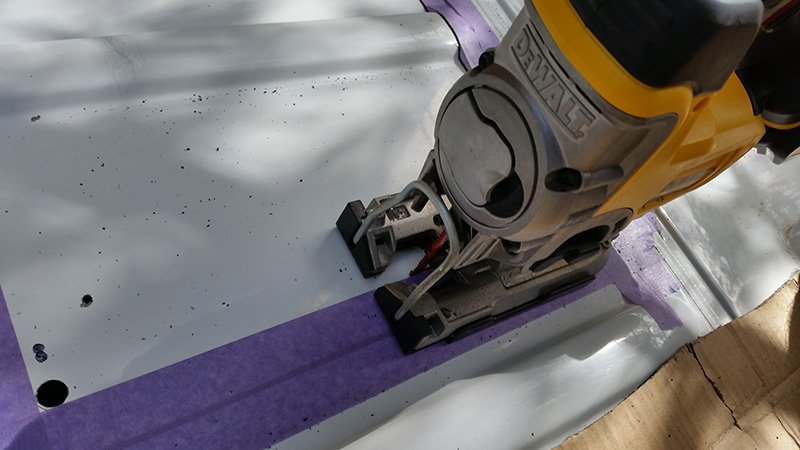
- Jig Saw: Very versatile tool. The jig saw is perfect for neat small cuts, curved cuts, larger pieces of steel or aluminium, cutting out the holes in the roof to install roof vents/fans and windows, and safely trimming off small sections. There’s different blades for different jobs. We recommend buying a mixed pack of fine and course blades, as well as longer length blades and blades suited to cut metal. Link: http://tiny.cc/t30rnz
- Dremel / Rotary Tool: This is the tool you will only use a few times in your build, but you will be happy to have it when you need it. Rotary tools can spin at very high RPM and have a huge assortment of different attachments and accessories to do all sorts of odd jobs – cut, polish, grind, engrave, sharpen and more. Buy a large accessory pack and take a moment to read the instructions about all the different things it can do. It’ll probably save you some headaches! Link: http://tiny.cc/v70rnz
- Oscillating Multi-Tool: This is a tool we don’t have in our collection, but it is one that we definitely could have benefited from having on hand. Like a rotary tool, the oscillating multitool is a very versatile power tool. It can do lots of different jobs in all sorts of tight or difficult access spaces. Link: http://tiny.cc/e9zznz
- Heat Gun: These are used for heat shrink on electrical cables, speeding up dry/cure time in cool conditions, and softening or warming surfaces. Link: http://tiny.cc/kn1rnz
- Cordless Vacuum: We only recently bought a cordless vacuum and our first thought was “why didn’t we get one of these years ago”. Having a cordless vacuum that uses the same batteries as you power tools means cleaning up as you go is a breeze. Don’t worry about battery compatibility either, as you can buy adapters to suit different brands. This means you can use a Makita vacuum with a DeWalt battery, as long as they’re both the same voltage. Link: http://tiny.cc/w90rnz
- DC Vehicle Charger for Tool Batteries: Not essential for your build, but since you will need it once you’re on the road you may as well get one straight up and get some use from it. Link: http://tiny.cc/li1rnz
- Spare / High Capacity Batteries: If using cordless tools, especially cordless saws, we recommend having plenty of spare batteries charged and ready to use each day so you don’t get held up if they go flat. Link: http://tiny.cc/7gbxnz
Hand Tools:
- Screwdriver Set: A good set of screwdrivers with both Philips and flat heads is essential to have on hand in various sizes and lengths. Link: http://tiny.cc/mi1xnz
- Pliers Set: You will want to have long nose pliers, square nose (linesman) pliers, and diagonal cutting pliers in your kit. Locking pliers (aka Vice Grips) are also a great tool and highly recommended to have a couple of different sizes in your kit. Link: http://tiny.cc/em1xnz
- Heavy Duty Scissors: Full size scissors are essential. Make sure they are sharp and durable enough to cut through thick materials like cardboard and corrugated plastic sheets. Link: http://tiny.cc/2t1xnz
- Box Knife / Utility Knife: A box knife is used to scour surfaces, quickly and easily cut through various materials, open packaging etc. Buy a packet of spare blades and change as needed to ensure it’s always sharp. Link: http://tiny.cc/px1xnz
- Hammer and Rubber Mallet: We recommend a claw hammer as it’s versatile, but other types of hammers will be good to have on hand too. A rubber mallet is also useful when you need something softer than a hammer. Link: http://tiny.cc/e01xnz
- Wrench/Spanner Set: Ideally you should get a full set of ratcheting spanners as they are easier to use in tight spaces. Useful for loosening and tightening bolts. Link: http://tiny.cc/e01xnz
- Socket Set: A full set of sockets is essential for loosening and tightening bolts, especially in difficult to reach places as long as you have an extension tool. Ensure you have socket heads that are compatible with imperial, metric and E/Torx style bolts. Link: http://tiny.cc/e01xnz
- Rivnut / Plusnut Kit: Very useful for attaching bolt-on points on flat sheets and other hard to reach areas. We used rivnuts to secure most of our furniture, bed frame and solar panels to the metal frame of the van. This is much safer than relying on self-tapping fasteners or adhesives alone. Link: http://tiny.cc/w8zxnz
- Metal File: Best to have a few different shapes and surfaces (course/fine). Works well to quickly de-burr and remove sharp edges after cutting. This is especially important when cutting your roof vent holes and after cutting aluminium sections. Link: http://tiny.cc/df5xnz

Measuring and Marking Tools:
- Computer: Not a tool in the conventional sense. But a good quality computer is essential to turn your sketches and measurements into computer generated designs. Programs like Sketchup Free are very useful for creating and playing around with different layouts and designs. This lets you try things out before committing to building!
- Square: Essential for measuring and marking square right angles. Link: http://tiny.cc/vo2xnz
- Tape Measure and Caliper: We recommend a 8m long heavy duty version, but it’s also handy to have a spare 3 or 5m version on hand for quick measurements. A caliper is also very useful for measuring internal and external diameters. Measure twice, cut once! Link: http://tiny.cc/ws2xnz
- Chalk Line Marker: Essential for marking straight lines, especially on large sections of material like a ply sheet. Link: http://tiny.cc/4v2xnz
- Carpenter Pencils and Markers: Useful for marking sections to cut and trace. Keep a few pencils and other markers on hand at all times.

Miscellaneous:
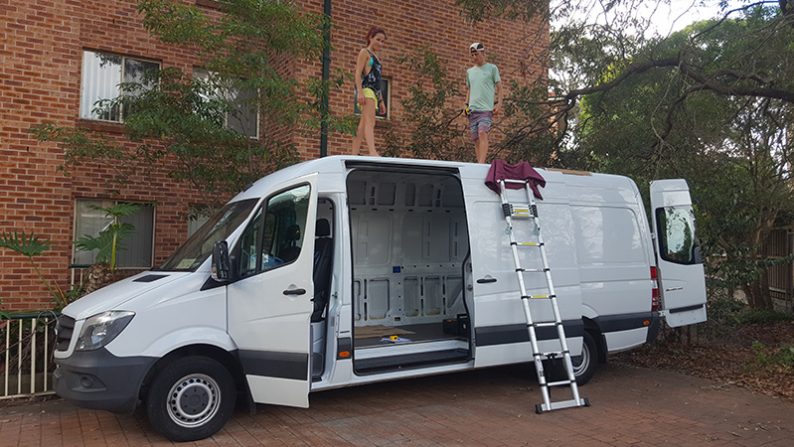
- Ladder(s): More the better. For high roof vans you will need at least a 2.8m ladder to help you get up onto the roof. Having two ladders will make it much easier to lift and install the awning and other bulky accessories. Link: http://tiny.cc/xvhxnz
- Work Bench(es): More is better. Having large, flat spaces off the ground will make your work much easier and neater. We used a plastic folding work table for our conversion. Having a couple of fixed benches would have been great too.
- Glues/Tapes/Cable-Ties: Keep a collection of various different glues, double sided heavy duty tape, and various size cable ties on hand. You will used them all the time.
- Tool Belt: We did without a tool belt during our van conversion. But in hindsight it was something that we really wished we had. Especially when working on the roof! It will make your life a lot easier to have your key tools readily available on you at all times.
Prefer to watch/listen? Check out the video we made on the topic here:
What did we miss? What is your favourite tool for van conversions?
Let us know in the comments below. Thanks for reading!
Leave A Comment